Maintaining the performance and accuracy of your BW Solo gas detector is critical when monitoring for toxic gases like chlorine (Cl₂). Over time, sensors degrade and require replacement to ensure continued safety and compliance. Fortunately, replacing the Cl₂ sensor in your BW Solo is straightforward and can be done in minutes — without exposing the internal components of the device.
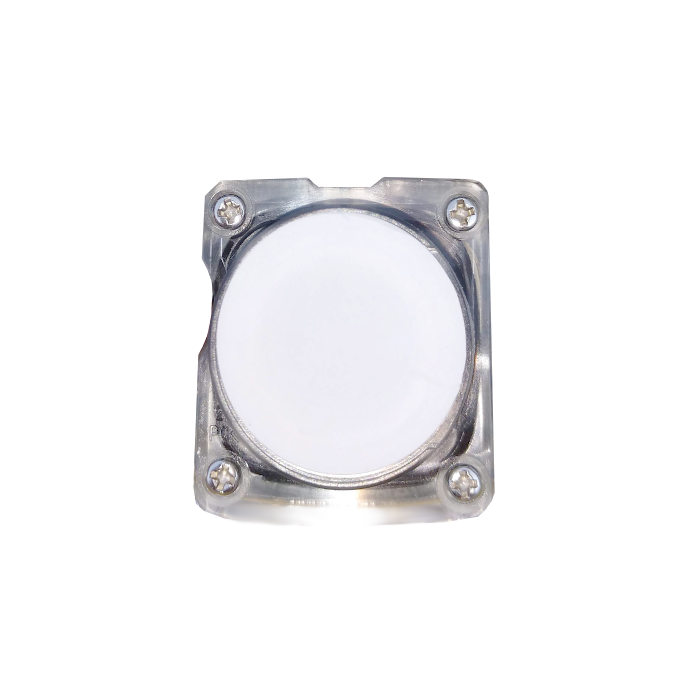
The BW Solo Replacement Chlorine Sensor is designed to measure Cl₂ levels from 0 to 50 ppm, providing reliable and rapid detection in a compact format.
Why Choose the BW Solo 1-Series Chlorine Sensor?
The 1-Series sensors from Honeywell are engineered for fast response, long operational life, and high performance, even in challenging environmental conditions. Key benefits include:
- Fast Response Time: Thanks to their compact design, gas diffuses into the sensor rapidly — detecting changes in gas concentration in real time.
- Reliable Performance: Built for demanding field environments, the sensor continues to deliver consistent readings with minimal drift.
- Long Sensor Life: Designed to last up to two years, each sensor is backed by a 1-year warranty.
- Easy Installation: Swapping out a sensor is quick and does not require you to open or handle sensitive internal electronics.
Step-by-Step Sensor Replacement Instructions
Replacing your Cl₂ sensor is a simple 14-step process:
- Power Down the Detector – Always start by turning off your BW Solo device.
- Remove the Front Cover – Use the calibration cap to gently lift off the front of the unit.
- Peel Off the Sensor Filter – Carefully remove and set aside the filter for reinstallation.
- Unscrew the Sensor Cover – Using a Phillips screwdriver, remove the four screws holding the sensor cover in place.
- Remove the Old Sensor – Lift out the existing sensor along with the sensor cover.
- Dislodge the Sensor – Push the top of the sensor with your thumb until it pops out of the cover.
- Remove the O-Ring – Take off the O-ring from the sensor cover.
- Align the Replacement Sensor – Match the winged corner of the new sensor with the corresponding corner on the cover.
- Fit the Cover – Press the sensor cover onto the new sensor about halfway.
- Fit the O-Ring – Flip the unit over and place the O-ring securely over all four corners of the sensor.
- Reinsert the Sensor and Cover – Align with the internal groove (on the alarm side) and place it back inside the detector.
- Secure with Screws – Tighten all four screws to fasten the cover in place.
- Replace the Filter – Reapply the sensor filter.
- Snap the Cover Back – Finally, snap the front cover back onto the unit.
Once complete, power the detector back on and run a bump test or calibration check to confirm proper sensor function.
Keep Your Team Protected
Whether you’re in water treatment, chemical processing, or industrial manufacturing, accurate chlorine detection is critical to workplace safety. The BW Solo Replacement Cl₂ Sensor gives you confidence that your device will perform when it matters most.
You can find this product here: https://www.gas-sensing.com/bws-pcb-cl2.html