The BW Solo is a trusted single-gas detector used in a variety of industries to ensure workplace safety. Over time, however, its sensors may need to be replaced to maintain accuracy and functionality. If you’re using your BW Solo to monitor nitrogen dioxide (NO₂), you’ll want to be familiar with how to replace the NO₂ sensor when the time comes.
About the Replacement NO₂ Sensor
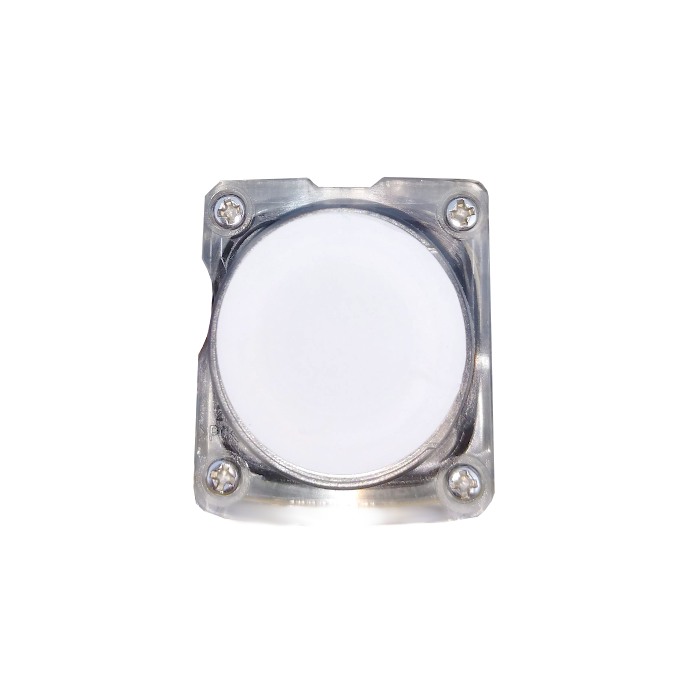
The replacement NO₂ sensor for the BW Solo is designed to detect nitrogen dioxide levels ranging from 0 to 100 ppm. It uses the advanced BW Solo 1-Series sensor technology, which is known for:
- Fast Response Time: Thanks to the compact design, gas can diffuse rapidly into the sensor, allowing it to react quickly to environmental changes.
- Reliable Performance: These sensors maintain accuracy and sensitivity even in extreme conditions.
- Long Service Life: Designed to last up to two years, each sensor comes backed with a one-year warranty.
- Ease of Replacement: Changing the sensor is quick and easy, without the need to open or tamper with the detector’s internal components.
Step-by-Step Guide: Replacing the BW Solo NO₂ Sensor
Follow these steps carefully to replace the NO₂ sensor in your BW Solo:
- Power Down the Detector
Turn off your BW Solo to ensure safe handling. - Remove the Front Cover
Use the calibration cap to gently remove the front cover of the device. - Peel Off the Sensor Filter
Carefully remove the sensor filter to expose the internal sensor area. - Unscrew the Sensor Cover
Using a Phillips head screwdriver, take out the four screws securing the sensor cover. - Take Out the Old Sensor
Gently lift the sensor and cover out of the device. - Pop the Sensor from the Cover
Press the top of the old sensor with your thumb to release it from the cover. - Remove the O-Ring
Take the o-ring off the sensor cover—it will be reused. - Align the New Sensor
Match the winged corner of the new sensor with the corresponding corner on the cover. - Attach the Sensor to the Cover
Press the cover over the sensor halfway—do not snap it all the way in yet. - Reinstall the O-Ring
Flip the assembly and fit the o-ring around the sensor, ensuring all four corners are securely in place. - Place the Sensor Back Into the Detector
Align the sensor with the groove on the alarm side of the device and insert it carefully. - Secure with Screws
Replace and tighten the four screws to secure the sensor and cover. - Replace the Sensor Filter
Reapply the sensor filter over the sensor area. - Snap the Cover Back On
Press the front cover back into place until it clicks securely.
Final Thoughts
Replacing your BW Solo NO₂ sensor is a simple but essential maintenance task that ensures your gas detector continues to perform reliably. With the robust and efficient 1-Series sensor technology, you can expect accurate readings, rapid response, and durability even in the toughest environments.
You can find this product here: https://www.gas-sensing.com/bws1-pcb-d.html